Rocky road, one of those fabulous things you are sure must be American (who else throws so many calorie rich things into melted chocolate and calls it dessert?) but actually turns out to be European (or not; the origins remain unclear). Wherever it came from, it is definitely here to stay, and to my surprise I realised I'd never made it myself. While it is one of the easiest recipes to make, one of my colleagues actually had his 8 year old daughter make it for his birthday treat.
So, for a quick (but very rich) and easy (no baking involved) treat:
Ingredients
400 g chocolate (I used 200 g milk and 200 g dark)
250 g butter
100 ml golden syrup
Melt all these in a heatproof bowl over boiling water, until well combined. Then, you can add whatever you like, but classic ingredients include:
- crushed digestive biscuits
- raisins/sultanas/dried cranberries
- marshmallows
- nuts
For mine, I added:
200 g digestive biscuits (crushed)
100 g dried cranberries
about 10 marshmallows sliced into smaller bits
I left out the walnuts because I was planning to put in M&Ms, but then I forgot about the M&Ms, so the chocolate/filling ratio was not ideal. Will have to try again.
Anyway, line a tray with baking parchment. Stir the biscuits into the chocolate mixture, and then stir in any other ingredients you have until they are well covered in chocolate. Pour the mixture into your prepared tray and leave to set in the fridge for at least 3 hours, preferably overnight. Slice into small cubes (veeeery small cubes, it is very rich). The recipe makes quite a lot (depending on how small you cut them) so you could halve the ingredients for a more modest amount.
I wouldn't consider it a dessert myself, more something you have with a cup of tea after a long day (or during a film festival, which is where I handed out most of mine to grateful friends and other festival goers). Easy, quick and delicious!
Friday, 29 September 2017
Sunday, 17 September 2017
Devil's food cake
So after making my apple cake last week, I came to the horrible realisation that I'd never actually made a chocolate cake. Not a proper one, I have made cakes in which I added a load of cocoa powder, but that doesn't make it an 'official' chocolate cake. So I dove into Mary Berry's recipes, and decided to make one that was called 'Devil's food cake'. I'd never heard of this cake before, but after making it, I have an idea of why it's called that way. Read on, and you will know too.
To manage expectations; this cake did not turn out well. It must be Murphy's law, because just a couple of days earlier someone (my mom) told me that my cakes always turn out great and that I've never had a bad bake. Well...
I've put the recipe below, adding in italics the points where something went wrong with my cake, and how you could avoid making my mistakes in the future. And also how I could avoid making my own mistakes again, as I will be making this cake again, to do it properly.
Ingredients
for the cake:
50 g cocoa powder
255 ml water
100 g butter
275 caster sugar
2 eggs
175 g flour
teaspoon baking powder
teaspoon bicarbonate of soda
for the frosting:
175 g caster sugar
1 egg white
2 tablespoons hot water
Preheat the oven to 180 C. Grease two 20 cm sandwich tins and line the base with baking parchment.
Ah, yes. I went wrong on the first step. Now I usually don't include the 'grease and line your tin' bit, because it is so obvious that it is second nature. However, as it turned out I did not have two 20 cm sandwich tins. I had one 20 cm sandwich tin, and one 20 cm loose-bottomed tin. I did however have two 24 cm sandwich tins. So I used those, figuring that with all those raising agents, the cakes would come out pretty big anyway. I was wrong there.
Second, I had lots of little bits of baking parchment left over, and was too lazy to cut out one big piece to line the bottoms. Usually with cakes, if you have a small bit you can pull on, the rest comes out easily too. As you can probably guess now, I was wrong there too.
Blend the cocoa and water together until smooth and set aside.
Have you ever tried to blend cocoa and cold water? It is weird. Somehow the cocoa is extremely hydrophobic and wants to stay on top of the water, or in clumpy bits at the bottom. It looks pretty horrible:
Luckily, this bit resolves itself once you blend it together.
Mix the butter and sugar by adding the sugar gradually and beating well in between until the mixture is pale and fluffy. Add the eggs one by one until you have a smooth mixture.
Sift the flour with the baking powder and bicarbonate of soda.
Yes, I went wrong here. How? How could one possibly mess up this bit, you wonder? Carefully read the first word: sift. I never sift. I am a quick and easy baker, who does not sift her flour. Usually I get away with this, because you mix the flour in the with the rest, and the lumps get beaten to death. However, this cake was of the 'fold in' variety, so that did not happen. Also, the flour was pretty old and hard. So I had lumps. A lot of lumps.
Fold the flour mixture and cocoa-water mixture alternatively into the butter-sugar mixture until well blended. Divide the mixture between the tins and level the surface.
So at this point, I could see it would be a lumpy thing. I tried breaking up the flour lumps, but you cannot really put any force on the mixture, as 'folding' means 'try to work as quickly and lightly as possible or the air will escape from your cake and leave you with a horrible flat pancake'. So I managed to get a few of the larger lumps broken up, but most medium-sized lumps just bided their time at the bottom of the bowl. The irony is of course, that I still ended up with a pancake, because it could not rise properly. Anyway...
Bake in the oven for 30-35 minutes until well risen (hah!). Leave to cool in the tins for a few minutes then turn out, peel off the parchment and finish cooling on a wire rack.
My cakes were not well risen. One had stayed exactly the same size, the other had somewhat doubled in height, but not nearly as much as one might expect with this amount of raising agents. Most likely because the tins I used were too large and because the lumps made the cake quite heavy. Also, all the lumps had gone to the bottom, so once I turned them out you could clearly see the cratery landscape I'd produced. And as you can probably guess from the first mistake I made; it was almost impossible to get the cakes out of the tins without breaking them. They stuck to the un-parchmented parts of the tins like frosting to a spoon. I incurred several breaks before I had them both out.
The frosting, on the other hand, was a breeze. Put the sugar, egg white and water into a heat-proof bowl and set over a pan of hot water. Whisk for about 10-12 minutes until thick, then sandwich the two cake halves together and put the rest on the top and sides. This stuff hardens out quite quickly, so work fast. Leave to set 'in a cool place, but not in the fridge' (apparently this is not a summer cake).
So, how did it turn out? Surprisingly good on the looks, but as predicted, very stodgy on the taste. The lumps (luckily!) did not turn into powdery flour explosions in your mouth, but were rather just hard chewy bits. If they'd been made of chocolate sprinkles, it might have been quite nice. As it is, my guinea pig friends were all pretty positive, but that may have been because I'd down-played it so much it could only be better than expected.
So, learning points:
- use the correct size tin as stated
- properly line your tins with baking parchment
- sift your flour before you add it.
Conclusion: the devil's food cake is devilish because it pretends to be a very easy run-of-the-mill cake, but then it tricks you into making all kinds of basic rookie baking mistakes that make your cake come out like a lumpy pancake.
To manage expectations; this cake did not turn out well. It must be Murphy's law, because just a couple of days earlier someone (my mom) told me that my cakes always turn out great and that I've never had a bad bake. Well...
I've put the recipe below, adding in italics the points where something went wrong with my cake, and how you could avoid making my mistakes in the future. And also how I could avoid making my own mistakes again, as I will be making this cake again, to do it properly.
Ingredients
for the cake:
50 g cocoa powder
255 ml water
100 g butter
275 caster sugar
2 eggs
175 g flour
teaspoon baking powder
teaspoon bicarbonate of soda
for the frosting:
175 g caster sugar
1 egg white
2 tablespoons hot water
Preheat the oven to 180 C. Grease two 20 cm sandwich tins and line the base with baking parchment.
Ah, yes. I went wrong on the first step. Now I usually don't include the 'grease and line your tin' bit, because it is so obvious that it is second nature. However, as it turned out I did not have two 20 cm sandwich tins. I had one 20 cm sandwich tin, and one 20 cm loose-bottomed tin. I did however have two 24 cm sandwich tins. So I used those, figuring that with all those raising agents, the cakes would come out pretty big anyway. I was wrong there.
Second, I had lots of little bits of baking parchment left over, and was too lazy to cut out one big piece to line the bottoms. Usually with cakes, if you have a small bit you can pull on, the rest comes out easily too. As you can probably guess now, I was wrong there too.
Blend the cocoa and water together until smooth and set aside.
Have you ever tried to blend cocoa and cold water? It is weird. Somehow the cocoa is extremely hydrophobic and wants to stay on top of the water, or in clumpy bits at the bottom. It looks pretty horrible:
 |
| Weird lumpy cocoa-water mixture. |
Luckily, this bit resolves itself once you blend it together.
Mix the butter and sugar by adding the sugar gradually and beating well in between until the mixture is pale and fluffy. Add the eggs one by one until you have a smooth mixture.
Sift the flour with the baking powder and bicarbonate of soda.
Yes, I went wrong here. How? How could one possibly mess up this bit, you wonder? Carefully read the first word: sift. I never sift. I am a quick and easy baker, who does not sift her flour. Usually I get away with this, because you mix the flour in the with the rest, and the lumps get beaten to death. However, this cake was of the 'fold in' variety, so that did not happen. Also, the flour was pretty old and hard. So I had lumps. A lot of lumps.
Fold the flour mixture and cocoa-water mixture alternatively into the butter-sugar mixture until well blended. Divide the mixture between the tins and level the surface.
So at this point, I could see it would be a lumpy thing. I tried breaking up the flour lumps, but you cannot really put any force on the mixture, as 'folding' means 'try to work as quickly and lightly as possible or the air will escape from your cake and leave you with a horrible flat pancake'. So I managed to get a few of the larger lumps broken up, but most medium-sized lumps just bided their time at the bottom of the bowl. The irony is of course, that I still ended up with a pancake, because it could not rise properly. Anyway...
 |
| Lumpy lumpy cake mixture. |
Bake in the oven for 30-35 minutes until well risen (hah!). Leave to cool in the tins for a few minutes then turn out, peel off the parchment and finish cooling on a wire rack.
My cakes were not well risen. One had stayed exactly the same size, the other had somewhat doubled in height, but not nearly as much as one might expect with this amount of raising agents. Most likely because the tins I used were too large and because the lumps made the cake quite heavy. Also, all the lumps had gone to the bottom, so once I turned them out you could clearly see the cratery landscape I'd produced. And as you can probably guess from the first mistake I made; it was almost impossible to get the cakes out of the tins without breaking them. They stuck to the un-parchmented parts of the tins like frosting to a spoon. I incurred several breaks before I had them both out.
The frosting, on the other hand, was a breeze. Put the sugar, egg white and water into a heat-proof bowl and set over a pan of hot water. Whisk for about 10-12 minutes until thick, then sandwich the two cake halves together and put the rest on the top and sides. This stuff hardens out quite quickly, so work fast. Leave to set 'in a cool place, but not in the fridge' (apparently this is not a summer cake).
So, how did it turn out? Surprisingly good on the looks, but as predicted, very stodgy on the taste. The lumps (luckily!) did not turn into powdery flour explosions in your mouth, but were rather just hard chewy bits. If they'd been made of chocolate sprinkles, it might have been quite nice. As it is, my guinea pig friends were all pretty positive, but that may have been because I'd down-played it so much it could only be better than expected.
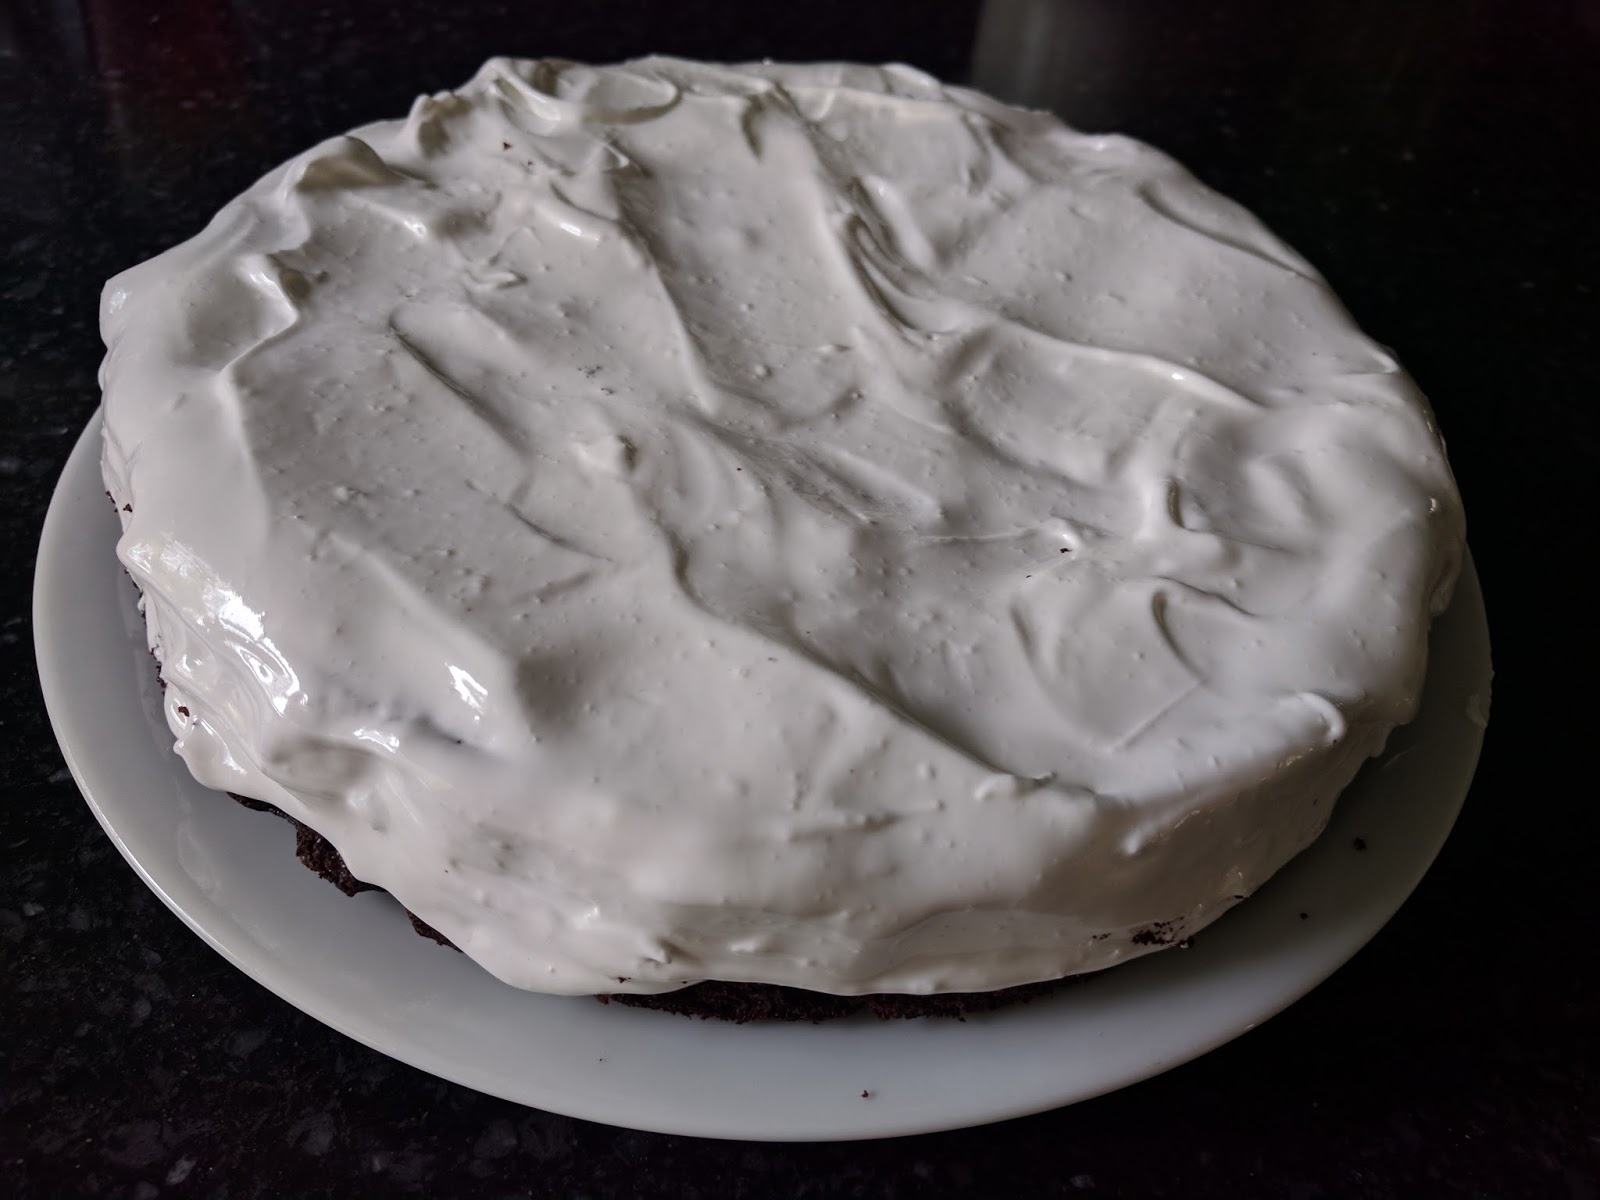 |
| Frosted devil |
So, learning points:
- use the correct size tin as stated
- properly line your tins with baking parchment
- sift your flour before you add it.
Conclusion: the devil's food cake is devilish because it pretends to be a very easy run-of-the-mill cake, but then it tricks you into making all kinds of basic rookie baking mistakes that make your cake come out like a lumpy pancake.
Sunday, 10 September 2017
Apple cake
It is that time of the year; schools have started again, the days are shortening, and Heel Holland Bakt is back on tv. HHB is the Dutch version of The Great British Bake-Off (which has also started again, but on one of the commercial British channels, so I can no longer watch it) and although not as good, it still gets you back into the baking spirit. So that is what I did, last weekend.
I'd made my family's apple cake recipe a while back (in 2014, even!), but this one came from a more distinguished source: Mary Berry herself. If she can't be on Bake-Off anymore, I can at least channel her baking spirit at home!
Ingredients
225 g butter
225 g muscovado sugar
225 g self-raising flour
(I just love this about cakes, just put the same amounts of butter, sugar and flour together, add some eggs, and ta-da: a cake!)
3 eggs (I used 4, but they were really small)
(baking powder)
100 g chopped walnuts
100 g raisins
400 g apples, cut in small pieces (I always keep the peel on, but you can take it off)
1 teaspoon cinnamon
Preheat your oven to 180 degrees.
As ever, mix the butter, sugar, flour and (if you're using it) baking powder together in a bowl. I always mix the 'dry' stuff (flour, sugar and baking powder) together first, before I add the softened butter in small lumps. Then add the eggs, until you get a fairly standard cake mixture. Mix thoroughly for about two minutes. Finally, add the chopped walnuts and raisins, and give it a final mix. I also added some cinnamon at this point, but it's not in the 'official' recipe.
Pour half of the mixture into your prepared (buttered and lined with baking parchment) cake tin. Then pour the apples and cinnamon in a layer on top, spreading it out evenly. Finally, pour the rest of your cake mixture on top. Make sure the edges are made of cake mixture, not apple, or you will have apples poking out of the side of your cake (as I did).
To finish off, sprinkle the top with more walnuts and muscovado sugar. You can leave some lumps in the sugar, but not too big, as it will just give you a mouthful of rock hard sugar when you eat it.
Bake for about an hour and a half, until golden brown and firm (mine was done in an hour and 20 minutes).
Looking good, right? It tasted good, too! Very autumny, with the soft juicy apple and the chopped nuts. If I were to make it again, I'd add some more spices (maybe the 'speculaaskruiden', or just some cardamom and nutmeg), but other than that it was a good start to the baking season!
I'd made my family's apple cake recipe a while back (in 2014, even!), but this one came from a more distinguished source: Mary Berry herself. If she can't be on Bake-Off anymore, I can at least channel her baking spirit at home!
Ingredients
225 g butter
225 g muscovado sugar
225 g self-raising flour
(I just love this about cakes, just put the same amounts of butter, sugar and flour together, add some eggs, and ta-da: a cake!)
3 eggs (I used 4, but they were really small)
(baking powder)
100 g chopped walnuts
100 g raisins
400 g apples, cut in small pieces (I always keep the peel on, but you can take it off)
1 teaspoon cinnamon
Preheat your oven to 180 degrees.
As ever, mix the butter, sugar, flour and (if you're using it) baking powder together in a bowl. I always mix the 'dry' stuff (flour, sugar and baking powder) together first, before I add the softened butter in small lumps. Then add the eggs, until you get a fairly standard cake mixture. Mix thoroughly for about two minutes. Finally, add the chopped walnuts and raisins, and give it a final mix. I also added some cinnamon at this point, but it's not in the 'official' recipe.
Pour half of the mixture into your prepared (buttered and lined with baking parchment) cake tin. Then pour the apples and cinnamon in a layer on top, spreading it out evenly. Finally, pour the rest of your cake mixture on top. Make sure the edges are made of cake mixture, not apple, or you will have apples poking out of the side of your cake (as I did).
To finish off, sprinkle the top with more walnuts and muscovado sugar. You can leave some lumps in the sugar, but not too big, as it will just give you a mouthful of rock hard sugar when you eat it.
Bake for about an hour and a half, until golden brown and firm (mine was done in an hour and 20 minutes).
 |
| Pretty pretty apple cake |
Looking good, right? It tasted good, too! Very autumny, with the soft juicy apple and the chopped nuts. If I were to make it again, I'd add some more spices (maybe the 'speculaaskruiden', or just some cardamom and nutmeg), but other than that it was a good start to the baking season!
Subscribe to:
Posts (Atom)