Showing posts with label baking. Show all posts

Tuesday, 29 December 2020

Spicy kletskoppen by Yvette

Kletskoppen are a typical Dutch biscuit, or rather a typical Dutch variety of the biscuit family that concerns itself with buttery/sugary biscuits. Think brandy snaps, only not rolled up. The name 'kletskop' literally means 'bald heads', not sure where that comes from; maybe 'fat belly' would have been a better name as these cookies are pretty fat and the type that you just have to keep on eating.

Anyway, I was in charge of the dessert for Christmas (again) this year and I'd decided to make cranberry/walnut brownies by Paul with ice cream. But since those are both 'soft' foods, I wanted to add something with a crunch. Hence the kletskoppen, which some restaurants also serve when you order brownies for dessert (better steal a good idea than think up a bad one, as we say in Dutch).
So, I looked up kletskoppen recipes and of course Yvette has one. It is one of the easiest recipes I've ever seen from her, perfect for a rainy afternoon where you don't know what to do with yourself. It needed a couple of things I didn't have, as I conceived of this plan in the early hours of Christmas day, but I made do with what I had. I'll put in the actual recipe and what I made of it.

Ingredients
250 g light muscovado sugar
75 g almonds, chopped (I did not have 75 grams, but I'm guessing 50 is the lowest you can go)
125 g flour
125 g butter
1/2 teaspoon salt
1 teaspoon five-spice powder (I didn't have this, but I added some of the separate ingredients: cinnamon, nutmeg (should really be cloves, but they're close to the same thing), pepper and fennel, the only thing missing was star anise)

Preheat the oven to 200 C.
Line a baking tin with baking parchment. Yvette actually tells you to butter a baking tin, but as these things already emit loads of butter upon baking, I decided to use paper instead.
Quickly combine all the ingredients into a ball. Separate the big ball into smaller balls, about 25 in total.
Put the smaller balls in groups of 6 or 8 on your baking tin, leaving lots of space in between. 

Lots of space means lots of space.

Bake for 8 to 10 minutes, keeping a constant watch. They're done when they're flat and brown.
Take the tin out of the oven, leave the biscuits to cool for a little while and then remove them with a pallet knife to cool and harden completely. 
Keep in an airtight tin, otherwise they'll become soft pretty quickly.

As you can see, these are the same six balls, only now they're kletskoppen.

I took them out after 8 minutes, which I think may have been a bit too soon; some were really nice and dark brown, with that characteristic caramel taste, but some of them were still a bit doughy or soft. But the taste was still really good, much more spicy then those you buy from the supermarket. And they worked really nice with the brownie and ice cream, too!

Christmas dessert combo.

Thursday, 24 December 2020

Apple crumble pie by Yvette

When I was a student, I made lots of apple crumbles. Whenever we'd forgotten to buy desert, I'd just dice some apples, mix butter, flour and sugar into a somewhat lumpy mixture, stick it all in a pan and put in the oven. It always came out hot and tart and delicious. Somehow, I forgot about all that.
So when my birthday was coming up (the one for which I also made the ultimate chocolate birthday cake) and I saw an apple crumble recipe by Yvette van Boven, I knew this was one of the things I wanted to make. I always make an apple pie for my birthday, this year it would be something different. As with all Yvette recipes, this involved a little bit more work than I usually do, but the end result was amazing, as always.

Ingredients:
For the dough:
175 g butter
200 g flour
50 g icing sugar
pinch of salt

For the apple filling:
750 g apples, diced
75 g light muscovado sugar
zest and juice of half a lemon
1 tablespoon cinnamon
1 tablespoon ginger powder
3 bay leaves
pinch of salt
60 g butter
half a jar of blackberry jam (I could not find this, so I substituted with fruits of the forest jam instead)

For the crumble:
125 g light muscovado sugar
100 g butter, in small cubes
175 g flour

Yvette says to use a 25 x 33 cm baking tin; I have no idea what size mine is, but something close to this will do. Grease and line with baking parchment.
First, make the pastry, which is of the shortcrust variety (not one of my strengths).
Combine the flour, icing sugar and salt.
Using a mixer, whisk the butter until it is creamy. Quickly combine with the flour mixture. Push the mixture into the baking tin and leave to cool in the fridge for at least an hour (I had time on my hands, so I made this the evening before).

Preheat the oven to 180 C.
Bake the bottom the oven for 25-30 minutes or until golden brown.
In the meantime, combine the apples, sugar, lemon peel, lemon juice, cinnamon, ginger, bay leaves and salt.
Melt the butter in a pan. Pour in the apple mixture and add about 100 mL water. Bring to a boil, then turn down the fire and leave to simmer until the apples are done and most of the water is evaporated, around 15-20 minutes. Remove the bay leaves.

Now for the crumble; this part I knew. Combine the sugar, butter and flour until you have the characteristic crumble lumps. I usually start off by rubbing the ingredients together until they form the 'fine breadcrumbs' stage, then combine it into a crumbly ball which I then separate into smaller crumbles again. But whichever way works for you.

Spread a thin layer of jam on the doughy bottom. Pour the apple mixture on top and spread the crumble mixture on top of the apples. Bake (again at 180) for 25-30 minutes or until golden brown. Leave to cool completely before removing from the tin and/or slicing.

Forgot to take pictures of the process, but this was the end result.

I would never have thought to put bay leaves in an apple crumble, but that is Yvette for you. The pie was sweet, tangy, with a hint of acidity. It's probably even better with actual blackberry jam, so if you can find that, do use it. It was pretty heavy; the recipe stated 4 people but it was more like 14. It keeps for a long time in the fridge, so ideal for a birthday spread out over several days!

Ultimate chocolate birthday cake

So my birthday was almost two months ago, but I did some baking for it and since I haven't posted any baking recipes for a while now, I thought I'd add some more. 
Naturally my birthday was a bit different this year, spread out over several days with small groups of people coming to visit. Instead of my usual three cakes, I made two; an apple crumble by Yvette and what the recipe called 'the ultimate chocolate birthday cake'. This involved some washing up in the middle, as it requires three bowls and then some more. Also, it involves making a chocolate ganache, something I've seen on the Great British Bake-Off lots of times but hadn't actually made myself. It all came out pretty neat, in a massive amount of chocolate and frosting. I advise you to make the slices small; it's not as bad as the Icelandic devil's food cake, but it's pretty close.

Ingredients
For the cake:
100 g milk chocolate (in pieces)
200 g butter
200 g creme fraiche
200 g flour
1 tablespoon baking powder
2 tablespoons cocoa powder
1 tablespoon sault
4 eggs
200 g sugar

For the ganache:
400 g dark chocolate (in pieces)
250 ml cream
50 g icing sugar

Preheat the oven at 165 C.
Line your (24 cm) tin with baking parchment and butter.
Put the milk chocolate, butter and creme fraiche in a bowl a top a pan of simmering water. When everything is melted, take the bowl off the pan, stir to combine and leave to cool until lukewarm.
Put the flour, baking powder, cocoa, and salt in one bowl and mix together,
In another bowl, mix the eggs and sugar until they are a smooth, pale mixture.

The three bowl set; dry ingredients, egg mixture and chocolate.

Gently stir the molten chocolate mixture into the egg mixture. When it is all combined, add the flour mixture and combine again.
Pour the mixture into the tin and bake for about 50 minutes. Leave to cool in the tin for at least 20 minutes, then turn it out and cool completely. You can do this the day before; store the cake wrapped up in the fridge.

Next, make the ganache. Put the dark chocolate and cream in a bowl set over a pan of simmering water (sounds familiar?). When everything is combined, take off the pan and leave to cool completely.
Finally, add the icing sugar and whisk until combined. You can make the ganache one day earlier too, just put it in the fridge until you are going to finish the cake.

To assemble, cut the cake halfway. Spoon one third of the ganache on the bottom half and spread all over, careful not to let it run off the sides. Put the top half back on and spread the rest of the ganache over the top. You can decorate this in any way you like; nuts, chocolate swirls, et cetera. I chose to keep mine plain, partly because it is such a heavy cake already and partly because it was just so shiny.

Pretty pretty cake with an attempt at swirls on top.

It was rich and tasty, and making ganache is so much easier than it sounds! Not sure if this was the 'ultimate' birthday cake, but it was a pretty good one!

Sunday, 18 March 2018

Pecan and chocolate tart

My successful pie-baking attempt last weekend left me hungry for more (yes, that will be the last of the food-related wordplay for this blogpost). Funnily enough, being so adverse to anything pastry-related has left me with hardly any cookbooks that contain pie recipes. After a long search I found one in Paul Hollywood's How to Bake, one of those cookbooks I should really use more often. It was called a 'pecan and chocolate tart', but it did require sweet pastry. If I ever find the time I will have to look into the difference between a pie and a tart, because I thought I had all the baking lingo figured out and this should have been a pecan and chocolate pie (similar to the infamous pecan pie I made 5 years ago) according to my semantic weather vane. But let's not worry about that now!
Funnily enough, the sweet pastry (or 'pate sucree') recipe Paul Hollywood uses is different from the one Yvette used. I thought this would be one of those 'baking basics' that are universally the same, but apparently you can give this your own twist. Still finding myself somewhat in a pastry apprenticeship, I decided to follow Paul on this one.

Ingredients
For the sweet pastry:
180 g flour
120 g cold butter, cubed
55 g sugar
1 egg

For the filling:
80 g dark chocolate, in pieces
45 g butter, cubed
160 g sugar
235 g golden syrup
3 eggs
235 g chopped pecan nuts (or 220 g in my case, as they come in 110 g packages)

As always, first make the pastry. Combine the flour and sugar and rub in the butter with your fingers until you reach the magical 'fine breadcrumbs' stage. Try to work quickly to keep the butter as cold as possible. Add the egg, combine into a dough, and form into a ball. Wrap in clingfilm and leave to chill in the fridge for about 2 hours. Take it out of the fridge and leave for at least 15 minutes.

Grease your loose-bottomed tart tin. Roll out the dough on a lightly floured surface until it is big enough to fill the tin. Transfer to the tin and push it neatly into the edges, not stretching or pulling the dough (that is what causes the shrinkage). Trim off the edges and put back in the fridge while you make the filling.

For the filling, put the butter and chocolate to melt au-bain-marie, stirring to an even mixture. Set aside to cool.
Next, combine the syrup and sugar in a pan, stirring all the while, until it comes to a boil. Set aside to cool, but make sure it is still runny.
Beat the eggs together, add the melted chocolate/butter mixture and whisk until smooth. Now for the difficult part; while you keep whisking, pour in the hot syrup mixture in a thin trickle until it is fully incorporated. If you're smart, you let your KitchenAid do the whisking, or have someone else pour in the syrup. If you're unprepared like me, you hold the mixer in your left hand while your right arm cramps up from pouring in the syrupy mixture (or the other way around, if you prefer).
When the syrup is all incorporated, stir in the chopped pecans and set aside to cool.

Heat your oven to 180 C. Pour the mixture into your pastry case. If you're smart, pour the mixture in the case while it is already in the oven, as it fills all the way to the top and transferring the tin without spilling the mixture is a challenge. Bake for about 40 minutes or until the mixture is set and the pastry is golden (for me, this took more like 55 minutes). Leave to cool completely.

Tart pre-bake (and pre-transfer to the oven)
Funnily enough, on this particular pie/tart concoction, the filling was more difficult to make than the pastry. The pastry actually did everything I wanted it to do. And it came out sweet and crumbly, what we would call 'bros' in Dutch; one of those words that has no direct English translation.

Pretty pie with pretty pastry
Actually, the filling was a bit of a let-down. It is rich in pecan and chocolate flavour, but the golden syrup comes through too strongly for my taste. It makes the whole tart a bit caramelly and clingy. This may well be the way a pecan pie (tart) is supposed to taste, but it is not one of my favourite tastes. I will have to look into more fresh and fruity pies, perhaps with raspberries or more lemony flavours, as this somehow feels autumny to me.
But apart from the syrup overdose, this is yet another notch on my pastry-making and pie-baking belt! I may even secretly be getting the hang of this...

Sunday, 11 March 2018

Apple Pie according to Yvette

I've written about lots of apple pies and apple cakes here; apples are my favourite fruit. The latter are the easier ones; I am more of a cake-baker than a pie-baker. Put even stronger; I always feel like channelling Gargamel when talking about pies; I hate pastry. I've only ever made one pie in the history of this blog, back in 2013: a pecan pie. There is a reason for this.
Pastry is horrible to make. It is 'just' flour, butter, some kind of liquid, rubbed together and chilled, then rolled out and put into a case. Simplicity is very much not bliss. Simplicity can go wrong every step of the way. I've had my pastry break, stick, shrink, become chewy or simply reduced to crumbs. In a way, I'd already decided never to try and make it again. But then I read this article about 'flow'; that productive state of mind in which you are completely zen. People generally only achieve flow when they're at work, but you can get into that state with every task that is taxing but not too difficult in an area you are somewhat accomplished in. In my case; baking. More specifically; baking with pastry. So I decided to give it another go.

I picked a recipe from my new-found favourite Yvette van Boven. It is an apple pie recipe, according to her 'the way it should be'. Indeed, it is a far cry from the classic Dutch apple pie I like to make for my birthday (which doesn't count as a 'true' pie, as the dough is completely different). It contains blackberries and ginger, apparently some of Yvette's favourites, which can of course be left out. As this was my first try, I made it exactly the way it was supposed to be.

Ingredients
For the pate sucree/sweet pastry:
500 g flour
250 g cold butter in small cubes
6 tablespoons icing sugar
salt
2 eggs, beaten
ice cold water

For the filling:
about 1,5 kg apples in small chunks
150 g blackberries
a thumb of ginger, peeled and diced
175 g sugar
juice of 1 lemon
1 teaspoon of cinnamon
1 teaspoon of ground ginger
1 tablespoon of flour

Finally:
3 tablespoons butter
1 tablespoon sugar
1 tablespoon milk
1 teaspoon ground ginger

First make the pastry. You can do this in a food processor, but I like to work by hand. Put the flour, sugar and salt in a bowl. Add the butter and rub together until the mixture resembles fine breadcrumbs. Add the eggs and knead quickly into a ball. If the dough is too dry, add a few drops of water (or milk) to make it come together. Shape into a ball, wrap it clingfilm, and put in the fridge for half an hour to an hour. Take it out, and leave to rest for about 15 minutes.

Then make the filling, by combining all ingredients except the flour into a bowl. Let this sit for about 20 minutes, then drain off the excess liquid. Finally, add the flour and combine.

Preheat the oven to 200 C. Grease a pie tin; I used a 'normal' tin of 24 cm in diameter.
Now for the difficult bit: divide the pastry into three quarters for the case, and one quarter for the 'lid'. Roll out the big part onto a lightly floured surface, until it is large enough to cover the bottom and sides of your tin. Put it in the tin, leave the edges hanging over the side.
Fill the pastry case with the fruit filling. Divide the 3 tablespoons of butter over the top.
Roll out the pastry for the lid, cut into strips, and weave a nice basket shaped lid. Make sure there are enough holes in the lid for the excess liquid in the fruit to evaporate. Push the sides together in any shape you like (or can manage), so the bits hanging over the edge make a nice side to the lid.
Brush the milk on the top of the pastry. Sprinkle the sugar and ground ginger on top.
Turn the oven down to 180 C and bake for 1,5 hours.

Right, that is the theory. How did this work out in practise? Let's have a look:

Pretty apple pie
Not too bad. I would even dare to say that my cake looks quite a bit like the one in the picture (I was in no mood to shape strips of pastry in any kind of lattice work, so it looks a bit like a basket-shape, but upon closer inspection it is really a lazy piece of work).

However, when cutting into it, the pie turned into somewhat a bloody mess:
Pretty bloody pie

Ah, not all liquid had been properly drained off. The bottom of the pie was somewhat undercooked from all the moisture still in the filling. However, the pastry on the side was flaky and crumbly, a bit on the dry side, but all in all way better than I'd expected. Also, the moisture was trapped inside the pastry, meaning the case hadn't broken or shrunk. No patch up jobs needed to keep the filling on the inside.
The filling itself was moist, sweet, with a spicy heat from the ginger, with the blackberries adding another layer. I agree with Yvette that it is a great combination of flavours, but I wouldn't call it the best ever. However, it leaves lots of room for variation. And with this new positive pastry experience under my belt, there may be more pie baking in my future!

Saturday, 20 January 2018

Lemon and poppyseed cake: the sequel

So last week I made this very light lemon and poppy seed cake from a recipe by Yvette van Boven, and although it was great and lovely and light, it was a bit too much of a hassle for me to fit this into a quick Saturday afternoon bake. So I decided to try again, this time using a simple cake which I've been baking my entire childhood (the English would call it a pound cake), which requires only one bowl, a simple set of instructions, and no splitting of eggs. Also, no glazing. Let's see if this works just as well.

Ingredients
200 g butter
200 g sugar
200 g self-raising flour
2-3 eggs (combined weight should be about 200 g)
2 tablespoons poppy seeds
juice and peel of one lemon

Preheat the oven to 180 C and grease and line a baking tin. I used a loaf tin for this one.
Mix the butter and sugar together until creamy. Add the flour, poppy seeds, lemon juice and peel.  Finally, add the eggs one at a time, and keep whisking for about 4-5 minutes after the last egg has been added to add as much air as possible (I made this cake in the KitchenAid, so no sore arms from too much whisking).
Pour the mixture in the baking tin and bake for about 40-45 minutes. Leave to cool.
If you want, you can add a glaze, but my teeth were still recovering from the last cake, so I didn't. We just had a slice, still-warm from the oven, with our morning tea.

So, the verdict. Is this easy, run-off-the-mill cake just as good as Yvette's fancy one?
Sadly, or gladly, depending on your point of view, it isn't. It's a pretty nice cake, but it is quite heavy and stodgy compared to the 'light' professional one. The texture really is much denser. The lemon doesn't come through quite as well in this cake, it tastes more buttery. All in all, this makes you feel as if you won't have to eat anything for the rest of the day, while the other cake somehow floats away to an airy memory.
Funny, isn't it, how using almost exactly the same ingredients, just a few simple differences in the method leaves you with two so wildly different cakes? The lack of airiness is all due to the lack of separately beaten egg whites, of course, and it is good to know that that makes so much of a difference. And Yvette's cake would have been even lighter if I'd followed her recipe and used 4 egg whites instead of 2.
Anyway, moral of the story is; more elbow grease and bowls to wash also gives you a better cake. And as it turns out, Yvette also has a recipe for a pound cake, one that does involve two bowls and egg splitting and separately beaten egg whites, but is otherwise almost as simple as the one above. This, combined with the lemon juice and poppy seeds, may well be the holy grail of lemon and poppy seed cakes; stay tuned!

Sunday, 14 January 2018

Very light lemon and poppy seed cake

My previous recipe by Yvette van Boven was a hit, so I decided to try another one this weekend. I made a lemon and poppy seed cake a long, looong time ago (turns out it was 2012... can you believe it?), so it was high time I made another! The poppy seeds took some time to get a hold of, but when those were in my possession, I was ready for the 'very light' lemon and poppy seed cake that Yvette describes. Technically the recipe isn't her own, as she describes a friend buying a lemon and poppy seed cake bought in London and recreated from the ingredients list. Whichever way she came by it, I decided to try it out.
Usually I try to follow new recipes to the letter, but this time I had some reservations against that. Firstly, the recipe required 6 eggs; 2 whole and 4 egg whites. I have nothing against baking with eggs, but 6 felt a bit too extravagant for 'just a cake' (must be my Dutch nature playing up). So I brought that down to 2 whole eggs and 2 egg whites. Secondly, if you follow this recipe properly, you need 4 bowls. I don't know how large your kitchen is, but I do not have 4 mixing bowls. Thirdly, the glazing required 250 grams of icing sugar, which is sweet enough to reduce your teeth to rotting black stumps. So I reduced that to more normal proportions. And finally, to whisk egg whites, you need a very clean bowl and very clean mixer. According to the recipe, I had to mix all the other ingredients first, then clean the whisks, and then whisk the egg whites. What with all the bowls and organisation going on already, this felt like too much hassle. So I whisked the egg whites before doing anything else, thus probably violating about 3 Main Baking Laws, but making my own life a little easier.
So, that brings me to the actual story:

Ingredients:
200 g butter, at room temperature
200 g white muscavado sugar
2 whole eggs
peel and juice of 2 lemons
2 tablespoons poppy seed
200 g flour
5 g baking powder
2 (or 4) egg whites

For the glazing:
juice of one lemon
120 (or 250) g icing sugar

You can make this cake in either a loaf tin or a round tin. I used a round tin, to get a more 'cakey' feeling, and because this gives you bigger slices to serve to friends (I always try to bake when I know people will be visiting, so I won't have to eat too much cake). Anyway, grease the tin and line with baking parchment. Preheat your oven to 170 C.
I started by mixing the egg whites together with a pinch of salt until firm enough for the bowl to be held upside down. Officially, this step is after the adding of the dry ingredients to the wet.
Mix the butter and sugar until smooth. Add the eggs one at a time, beating well in between. Add the lemon peel, juice and poppy seeds and mix well.
Sift the flour and baking powder together over the mixture, and spoon through until the mixture is smooth.
Add the whisked egg whites; first add one spoonful and incorporate this well, then add the rest and stir until combined. Pour the mixture into the prepared tin and bake for about 30 minutes.

This cake has a relatively high sugar content, so it will brown quickly. Do not be fooled into thinking it is more baked than it is; an underbaked cake will collapse (as mine did). Also, it will stick to the tin, so make sure to grease the tin really really well.

When your cake is done, take it out of the oven and let it cool for a couple of minutes before turning it out.

To make the glazing, simply mix the lemon juice and icing sugar until you have a runny consistency. Pour over the (slightly cooled) cake and leave to harden.

Not an optical illusion: that is quite a dip in the middle.

Now, as I mentioned, my cake had collapsed slightly in the middle. This meant that all the glazing pooled into the dip in the middle, making the first small bites from the middle very very lemony. Also, the 'crust' stuck to the tin when I took it out, so bits of the 'crust' were lost as trimmings

Pretty, pretty crumb structure!

But the texture of the cake came out perfect. Not just light, as the recipe says, but almost fluffy. This may well be one of the best cakes I've ever made, crumb structure wise. Even Mary Berry may have been impressed. The poppy seed taste came out well, although the lemon is a bit too strong in comparison. I will use less lemon juice in the glazing in the future, as it takes away from the actual cake taste. But otherwise, it was pretty close to perfect, and I won't wait another 6 years before making another lemon and poppy seed cake.

Friday, 5 January 2018

Healthy fruitcake

So one of my favourite new baking-recipe sources is Yvette van Boven. If you aren't Dutch you've probably never heard of her, but she is a great and funny and down-to-earth baker/cook. I bought her baking cookbook Home Baked with the book coupons I got for my birthday.
Yvette van Boven combines classic Dutch recipes with Irish inspiration, as she grew up in Ireland. Since my baking style is also a mix of Dutch and English, influenced by years of watching The Great British Bake-Off, this suits me perfectly. Today, I didn't really know what I wanted to bake, so I let my boyfriend pick out something easy that didn't involve pie-crusts (my arch nemesis). His suggestion: almond-fruitcake.
Now Yvette also likes to include recipes that are gluten or 'fast sugar' free, and this is one of those recipes. As such, it includes almond flour, which turns out to be one of the most expensive things ever. You could probably get away with using wheat (or any other kind of) flour, but we shall see what the almonds add to the taste when the cake gets out of the oven.

Ingredients:
250 g almond flour (or wheat, probably)
1 tablespoon cinnamon
1/2 teaspoon bicarbonate of soda
1/2 teaspoon salt
1 apple or pear, cored and diced
100 g dried apricots (I cut these into smaller pieces too)
100 g dried prunes (cut, althoug the recipe doesn't tell you to)
50 g walnuts
4 eggs
1 teaspoon of honey
about 75 ml water

Grease a loaf tin with olive oil (if you want to be all vegan about it) or butter, line with baking parchment. Preheat your oven to 170 C (fun fact: Yvette also wants you to get an oven thermometer, so I now know exactly how hot my oven is. Turns out it is a lot cooler than it thinks it is).
Mix the dry ingredients in a bowl. Mix the fruits and nuts in another bowl, and combine with the dry ingredients. Then, lightly whisk the eggs together with the honey and add that to the dry mixture.

Fruity cake filling mixture
Now at this point Yvette tells me to 'add water until the mixture becomes creamy. This may be 50 ml, this may be 75'. However, my mixture was already pretty creamy. I checkt again, and turns out my apricots and prunes weren't actually the dried-dried fruits she mentioned, but just semi-dried and stuck in a package. So I didn't add any water. But if you have proper dried fruits, I'd add some water.
Pour the mixture into the prepared caketin and bake for about 40-50 minutes.

Now the only raising agents in this cake are the bicarbonate and the four eggs (lightly whisked) while there is a lot of heavy fruit in there. I was very curious to see whether this would come out looking anything like a cake, or more a stodgy lump. Luckily, I need not have worried.

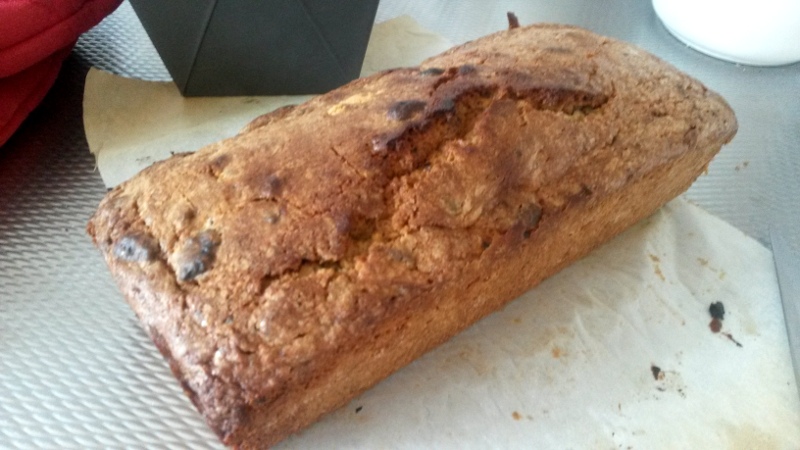
Fruity fruitcake

It was a proper cake, although not really the lightest cake I've ever eaten. Chock full of fruits and nuts, with sweetness from the cinnamon and honey coming through, while ate the same time feeling very very healthy. Not much of the almond flavour coming through, although the texture is a bit different than with a wheat flour cake. Still, I do think wheat flour would work.
The recipe picker declared this 'the best cake he'd ever eaten', so all was well in that regard.
Because I used so many large 'wet' fruits, the cake does somewhat fall apart when you slice it. If I'd known this beforehand, I would have cut the fruit in smaller pieces. So; dried fruits are okay to be a bit on the large size, fresh fruit should be cut. But that is mostly a logistical issue; flavour wise, it is great!

Thursday, 7 December 2017

Blueberry cake

So I've had my birthday in October, and of course I did some birthday baking. Normally I plan this pretty far in advance, but this year that somehow didn't happen, so I had to make a rather on-the-spot decision about what to make. For some reason (because they were on sale) I had lots and lots of blueberries. So naturally, I made a blueberry cake.
Looking for recipes for a blueberry cake, I came to the conclusion that you can either make:
- a plain cake with added blueberries
- a blueberry cheesecake
As my other cake was a mon chou cake, I didn't want to go for the cheesecake option, but just a plain cake with added blueberries sounded dull. So my solution was basically to make one giant blueberry cupcake, and call it a blueberry cake. And it was quite the hit!

Ingredients:
175 g butter
175 g sugar
3 eggs
225 g self-raising flour
1 tablespoon lemon zest
blueberries (I can't remember how many, but quite a lot. I think about 200-250 grams? Use fresh blueberries, not frozen ones)

For the frosting:
150 g mascarpone (I'd use cream cheese, but we don't have proper cream cheese here)
50-75 g icing sugar (depending on how sweet you want the frosting to be)
some blueberries to decorate

Preheat the oven to 180 C. Grease a sandwich tin and line with baking parchment.
Mix the butter and sugar together until creamy. Add the eggs one by one, the lemon zest, and the self-raising flour. Finally, use a spoon to stir in the blueberries (if you do this by electric mixer they will get mashed up). Spread the mixture in the cake tin and bake for about 50 minutes.
Let the cake cool completely, turning it out onto a plate or wire rack about 5-10 minutes after opening the oven.

Make the frosting simply by combining the mascarpone or cream cheese with the icing sugar. Add the icing sugar in small lumps and taste in between. The cake is not very sweet, so the frosting shouldn't be too sour if you like a sweet cake. Spread the frosting over the cake in any way you like and decorate with the remaining blueberries.

Blueberry galore (I kept the most gigantic ones to decorate).

Final judgement? What works for small blueberry cupcakes unsurprisingly also works for large(r) blueberry cakes. The cake was very moist and not too sweet, the blueberries went well with the mascarpone, basically all was well with the world. A perfect cake for late summer or early autumn, when blueberries are actually in season (one of the perks of having your birthday early autumn: all kinds of nice fruity things are plentily available).
In the future, I will try more of these cupcake-turned-into-real-cake experiments!

Friday, 29 September 2017

Rocky road

Rocky road, one of those fabulous things you are sure must be American (who else throws so many calorie rich things into melted chocolate and calls it dessert?) but actually turns out to be European (or not; the origins remain unclear). Wherever it came from, it is definitely here to stay, and to my surprise I realised I'd never made it myself. While it is one of the easiest recipes to make, one of my colleagues actually had his 8 year old daughter make it for his birthday treat.

So, for a quick (but very rich) and easy (no baking involved) treat:

Ingredients
400 g chocolate (I used 200 g milk and 200 g dark)
250 g butter
100 ml golden syrup

Melt all these in a heatproof bowl over boiling water, until well combined. Then, you can add whatever you like, but classic ingredients include:

- crushed digestive biscuits
- raisins/sultanas/dried cranberries
- marshmallows
- nuts

For mine, I added:
200 g digestive biscuits (crushed)
100 g dried cranberries
about 10 marshmallows sliced into smaller bits

I left out the walnuts because I was planning to put in M&Ms, but then I forgot about the M&Ms, so the chocolate/filling ratio was not ideal. Will have to try again.

Anyway, line a tray with baking parchment. Stir the biscuits into the chocolate mixture, and then stir in any other ingredients you have until they are well covered in chocolate. Pour the mixture into your prepared tray and leave to set in the fridge for at least 3 hours, preferably overnight. Slice into small cubes (veeeery small cubes, it is very rich). The recipe makes quite a lot (depending on how small you cut them) so you could halve the ingredients for a more modest amount.
I wouldn't consider it a dessert myself, more something you have with a cup of tea after a long day (or during a film festival, which is where I handed out most of mine to grateful friends and other festival goers). Easy, quick and delicious!

Sunday, 17 September 2017

Devil's food cake

So after making my apple cake last week, I came to the horrible realisation that I'd never actually made a chocolate cake. Not a proper one, I have made cakes in which I added a load of cocoa powder, but that doesn't make it an 'official' chocolate cake. So I dove into Mary Berry's recipes, and decided to make one that was called 'Devil's food cake'. I'd never heard of this cake before, but after making it, I have an idea of why it's called that way. Read on, and you will know too.

To manage expectations; this cake did not turn out well. It must be Murphy's law, because just a couple of days earlier someone (my mom) told me that my cakes always turn out great and that I've never had a bad bake. Well...
I've put the recipe below, adding in italics the points where something went wrong with my cake, and how you could avoid making my mistakes in the future. And also how I could avoid making my own mistakes again, as I will be making this cake again, to do it properly.

Ingredients
for the cake:
50 g cocoa powder
255 ml water
100 g butter
275 caster sugar
2 eggs
175 g flour
teaspoon baking powder
teaspoon bicarbonate of soda

for the frosting:
175 g caster sugar
1 egg white
2 tablespoons hot water

Preheat the oven to 180 C. Grease two 20 cm sandwich tins and line the base with baking parchment.
Ah, yes. I went wrong on the first step. Now I usually don't include the 'grease and line your tin' bit, because it is so obvious that it is second nature. However, as it turned out I did not have two 20 cm sandwich tins. I had one 20 cm sandwich tin, and one 20 cm loose-bottomed tin. I did however have two 24 cm sandwich tins. So I used those, figuring that with all those raising agents, the cakes would come out pretty big anyway. I was wrong there.
Second, I had lots of little bits of baking parchment left over, and was too lazy to cut out one big piece to line the bottoms. Usually with cakes, if you have a small bit you can pull on, the rest comes out easily too. As you can probably guess now, I was wrong there too.

Blend the cocoa and water together until smooth and set aside.
Have you ever tried to blend cocoa and cold water? It is weird. Somehow the cocoa is extremely hydrophobic and wants to stay on top of the water, or in clumpy bits at the bottom. It looks pretty horrible:
Weird lumpy cocoa-water mixture.

Luckily, this bit resolves itself once you blend it together.

Mix the butter and sugar by adding the sugar gradually and beating well in between until the mixture is pale and fluffy. Add the eggs one by one until you have a smooth mixture.

Sift the flour with the baking powder and bicarbonate of soda.
Yes, I went wrong here. How? How could one possibly mess up this bit, you wonder? Carefully read the first word: sift. I never sift. I am a quick and easy baker, who does not sift her flour. Usually I get away with this, because you mix the flour in the with the rest, and the lumps get beaten to death. However, this cake was of the 'fold in' variety, so that did not happen. Also, the flour was pretty old and hard. So I had lumps. A lot of lumps.

Fold the flour mixture and cocoa-water mixture alternatively into the butter-sugar mixture until well blended. Divide the mixture between the tins and level the surface.
So at this point, I could see it would be a lumpy thing. I tried breaking up the flour lumps, but you cannot really put any force on the mixture, as 'folding' means 'try to work as quickly and lightly as possible or the air will escape from your cake and leave you with a horrible flat pancake'. So I managed to get a few of the larger lumps broken up, but most medium-sized lumps just bided their time at the bottom of the bowl. The irony is of course, that I still ended up with a pancake, because it could not rise properly. Anyway...

Lumpy lumpy cake mixture.

Bake in the oven for 30-35 minutes until well risen (hah!). Leave to cool in the tins for a few minutes then turn out, peel off the parchment and finish cooling on a wire rack.
My cakes were not well risen. One had stayed exactly the same size, the other had somewhat doubled in height, but not nearly as much as one might expect with this amount of raising agents. Most likely because the tins I used were too large and because the lumps made the cake quite heavy. Also, all the lumps had gone to the bottom, so once I turned them out you could clearly see the cratery landscape I'd produced. And as you can probably guess from the first mistake I made; it was almost impossible to get the cakes out of the tins without breaking them. They stuck to the un-parchmented parts of the tins like frosting to a spoon. I incurred several breaks before I had them both out.

The frosting, on the other hand, was a breeze. Put the sugar, egg white and water into a heat-proof bowl and set over a pan of hot water. Whisk for about 10-12 minutes until thick, then sandwich the two cake halves together and put the rest on the top and sides. This stuff hardens out quite quickly, so work fast. Leave to set 'in a cool place, but not in the fridge' (apparently this is not a summer cake).

So, how did it turn out? Surprisingly good on the looks, but as predicted, very stodgy on the taste. The lumps (luckily!) did not turn into powdery flour explosions in your mouth, but were rather just hard chewy bits. If they'd been made of chocolate sprinkles, it might have been quite nice. As it is, my guinea pig friends were all pretty positive, but that may have been because I'd down-played it so much it could only be better than expected.

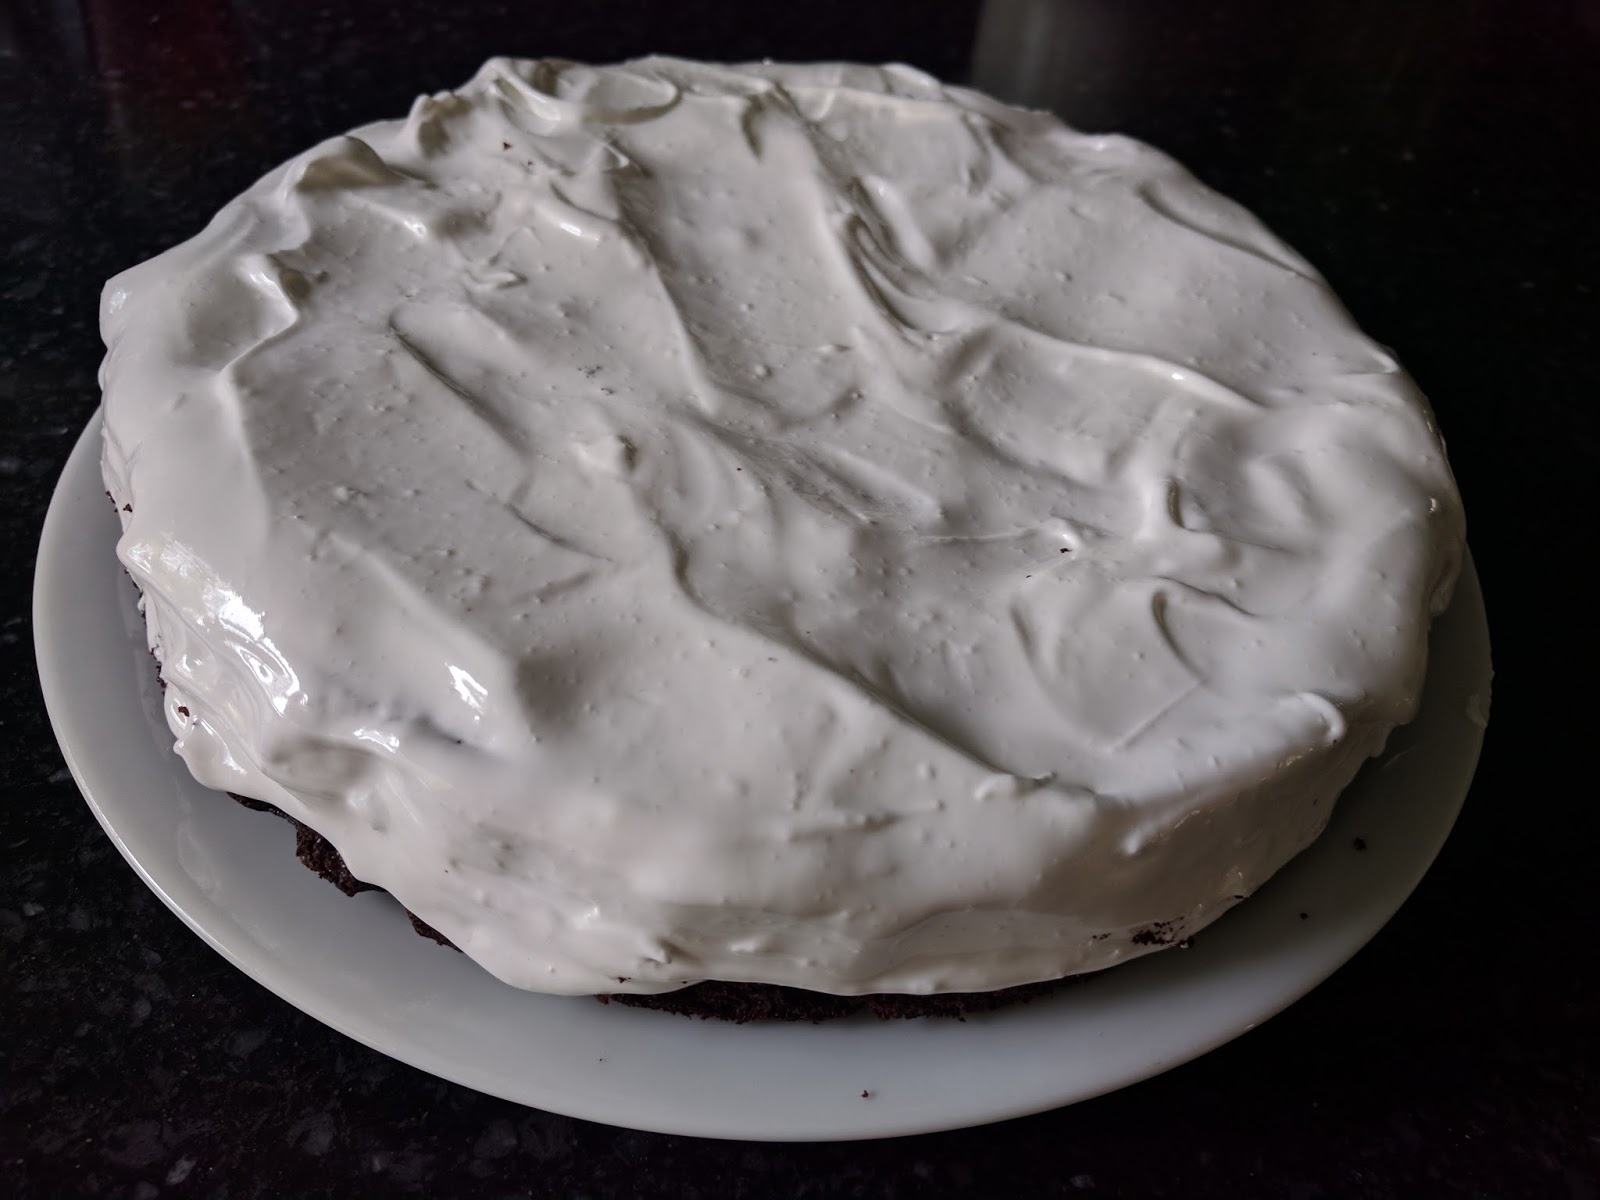
Frosted devil

So, learning points:
- use the correct size tin as stated
- properly line your tins with baking parchment
- sift your flour before you add it.

Conclusion: the devil's food cake is devilish because it pretends to be a very easy run-of-the-mill cake, but then it tricks you into making all kinds of basic rookie baking mistakes that make your cake come out like a lumpy pancake.

Sunday, 10 September 2017

Apple cake

It is that time of the year; schools have started again, the days are shortening, and Heel Holland Bakt is back on tv. HHB is the Dutch version of The Great British Bake-Off (which has also started again, but on one of the commercial British channels, so I can no longer watch it) and although not as good, it still gets you back into the baking spirit. So that is what I did, last weekend.
I'd made my family's apple cake recipe a while back (in 2014, even!), but this one came from a more distinguished source: Mary Berry herself. If she can't be on Bake-Off anymore, I can at least channel her baking spirit at home!

Ingredients
225 g butter
225 g muscovado sugar
225 g self-raising flour
(I just love this about cakes, just put the same amounts of butter, sugar and flour together, add some eggs, and ta-da: a cake!)
3 eggs (I used 4, but they were really small)
(baking powder)
100 g chopped walnuts
100 g raisins
400 g apples, cut in small pieces (I always keep the peel on, but you can take it off)
1 teaspoon cinnamon

Preheat your oven to 180 degrees.
As ever, mix the butter, sugar, flour and (if you're using it) baking powder together in a bowl. I always mix the 'dry' stuff (flour, sugar and baking powder) together first, before I add the softened butter in small lumps. Then add the eggs, until you get a fairly standard cake mixture. Mix thoroughly for about two minutes. Finally, add the chopped walnuts and raisins, and give it a final mix. I also added some cinnamon at this point, but it's not in the 'official' recipe.
Pour half of the mixture into your prepared (buttered and lined with baking parchment) cake tin. Then pour the apples and cinnamon in a layer on top, spreading it out evenly. Finally, pour the rest of your cake mixture on top. Make sure the edges are made of cake mixture, not apple, or you will have apples poking out of the side of your cake (as I did).
To finish off, sprinkle the top with more walnuts and muscovado sugar. You can leave some lumps in the sugar, but not too big, as it will just give you a mouthful of rock hard sugar when you eat it.
Bake for about an hour and a half, until golden brown and firm (mine was done in an hour and 20 minutes).

Pretty pretty apple cake

Looking good, right? It tasted good, too! Very autumny, with the soft juicy apple and the chopped nuts. If I were to make it again, I'd add some more spices (maybe the 'speculaaskruiden', or just some cardamom and nutmeg), but other than that it was a good start to the baking season!

Sunday, 7 June 2015

Oreo cake

A couple of weeks ago I made an Oreo cheesecake, wondering why I never thought of using Oreos in my baking before. Since a cheesecake technically doesn't involve any baking, I decided to rectify that today by making an Oreo cake.
I've been making plain old cakes since I was really young (it's one of the easiest recipes to remember: 3x 200 grams and 2 eggs, same as in the family recipe apple cake), but usually they turn out quite dry. Adding Oreos to the mixture seems to remedy that, and it tastes great!

Ingredients
200 g butter (softened)
200 g sugar
200 g self-raising (or plain) flower
2 eggs
a teaspoon of lemon zest
half a packet of Oreo cookies (about 12) broken into small pieces

Preheat the oven to 180 degrees, and line the sides of your cake tin with baking parchment.
Now you make this cake like you make any cake: mix the butter and sugar together until they are soft and creamy, add the flower, and then add the eggs one after the other. After adding the eggs, you have to mix continuously for about 4-5 minutes, to get enough air into the mixture for the cake to rise well. This can be really heavy on the hand and wrist, but since I now have my beautiful KitchenAid, I could let the machine do the work for me, and break up the cookies in the meantime.

KitchenAided multitasking.


Add the lemon zest and the Oreos in small quantities, and mix thoroughly so that everything is well-combined (your cake mixture will become somewhat blackish/brownish in colour, which doesn't look that great but means the Oreo taste is spreading its love).
Pour or spoon your mixture into the cake tin and bake for an hour at 180 degrees. My cake was a bit burned at the top, probably because of the really high sugar content. You could probably leave out some of the sugar (use 150 g instead of 200) because the Oreos themselves, especially the white stuff, contain a lot of sugar, but I thought of that after I put it in the oven, so not one of my brighter baking moments.

Slightly scorched cake.
As always, looks can be deceiving, and the taste is actually really really good. You can taste the Oreos, but the lemon zest also comes through quite nicely, and the cake itself is not too sweet. It isn't dry at all, but pretty moist and with a firm crust. And it looks great, almost not-homemade. I dare to say this may be one of the best cakes I made in a long time.

Somehow one slice disappeared before I could take a picture...

All because of the Oreos, of course!

Saturday, 16 May 2015

Oreo cheesecake

How did I not think of this before? Oreo cheesecake; two of the best things in the world, combined!
So in Beijing, we ate a lot of Oreos. Mainly because they are the only cookies that have a somewhat reasonable price (a roll of Oreos costs about 5 Yuan, whereas other cookies, such as chocolate chip, start around 45 Yuan. Still not a lot of money, but when something is 9 times more expensive than something else, and that something else is perfectly good... the choice is easy), and of course because they're well, Oreos.
All this Oreo-eating got me thinking; I wanted to bake something new, but I don't really have the time to go proper recipe hunting, and I should be able to make it quite quickly because I didn't have enough time to do serious baking before my friend came round for tea last Thursday. So, cheesecake is the perfect solution, as you can make it one day ahead and everybody (well, most people) like it. And then I thought: why not use Oreos for the base? And so the Oreo cheesecake was born.

I've done cheesecakes before, notably the double chocolate cheesecake, so I worked from those recipes, tweaking them somewhat to meet the stuff I actually had bought.

Ingredients:
154 g crushed Oreo cookies (the amount in one packet)
75 g butter (melted)
500 g mascarpone
200 g cream cheese
100 g sugar
1 tablespoon cocoa powder

Crushing Oreo cookies is a bit of a challenge, because the slippery white stuff in the middle means you'll mostly be separating the two biscuits instead of actually breaking them, but that's fine. As long as you end up with somewhat smaller Oreo bits.
Line the bottom of your tin with baking paper. Mix your Oreo bits with the melted butter, and add to the cake tin. Leave to cool (if the next steps take a while, you can put it in the fridge at some point (never put it in the fridge straightaway - melted butter is really hot and you're fridge won't like that)).
It won't look very appetising at this point:

Oreos and melted butter, hmmm.
But it's all about the taste!
For the cream cheese mixture, mix all the rest of the ingredients together until they are light(er) and fluffy(er). I added cocoa powder to make it a bit more chocolaty, but you can leave that out or replace it with something else (vanilla, or lemon). Spoon the mixture on top of your Oreo base and leave in the fridge for at least 2 hours.
You can line the sides of your tin with more baking paper, but experience has taught me that the cheesecake mixture will only cling to the paper instead of the tin, so I usually don't bother anymore. I just use a sharp knife to separate your cheesecake from the tin, and you're good to go.

I'm freeee!

It was a dark day. Chocolate to the rescue!

The end result is very tasty. It could be more Oreo-y, maybe you could add some Oreos to the actual cheesecake mixture, but nevertheless good. The cocoa in the mixture does make it more chocolaty, although you do need the sugar to get the sweetness back up, otherwise it'll be pretty sour and bitter.
So Oreos, not just good for eating but for baking too. Obviously, I didn't do any 'real' baking for this one, just melting, so maybe I'll work out some other Oreo recipes that do involve the use of an oven in the future. But for now, we have Oreo cheesecake goodness.

Sunday, 12 October 2014

Choux try-out

The Great British Bake Off has finished again, leaving us with a huge gap to fill on Wednesday evening. But also, many baking ideas.
One thing I've been wanting to make for a very long time is choux pastry. In the earlier Bake Off seasons, this was presented as one of the most difficult things to make, apart from filo pastry. Now, in the later seasons, all the contestants can just whip up a choux no questions asked, although they do explain that it is a tricky thing to get right.
I've investigated the stuff, and discovered that it is in fact twice cooked dough; first you cook it when you combine butter and flour with boiling water, and then you cook it again in the oven. What I'd like to know is who ever thought of this first, and why anyone in their right mind would want to tip flour into boiling water and then beat in eggs without having them scramble. Because the resulting dough isn't really all that special, it's actually pretty tasteless, and has to be filled with some kind of cream to be appetising.

Anyway, the ingredients list is very short:

125 ml water
50 g butter
65 g flour
2 eggs (beaten)

Preheat the oven to 200 C.
Put the water and butter in a pan and heat on a gentle heat until the butter has melted. Then bring the water to a boil, take off the heat, and quickly dump in all the flour at once. Start stirring frantically until the mixture forms a ball-like dough and comes away from the sides.
(I never thought this was actually going to happen on the first try, and that I was going to waste a lot of water, butter and flour in the process, but lo and behold, it worked!)

Ball-like choux pastry sans eggs.
Now add the egg mixture a little at a time, beating thoroughly between until all the egg is absorbed. At this point, I realised I might have used a bigger pan, because the mixture kept sloshing over the side due to my vigorous beating.
When all the egg is absorbed you have nice shiny mixture, which you can pipe in whatever shape you want onto a baking parchment. I made some eclair shapes and some choux bun shapes.
Then it goes in the oven for 10 minutes at 200 C, and after that you turn the heat down to 170 and bake for another 30 minutes or until they are golden brown all around. I've found wildly varying baking times for these, so this is what I did, but I've also read recipes where they tell you to turn the heat up instead of down after the first 10 minutes.

As soon as they are done, take them out of the oven and pierce them to let the steam out. I was too late doing this with some of them, which means the steam will turn back into water and soak your choux buns, making them sloppy and inedible.

Leave to cool completely, split open, and fill with your favourite cream (I used whipped cream). You can drizzle chocolate over the top if you haven't forgotten to buy dark chocolate (which I did, and I felt too lazy to go back to the store).

Eclairs filled with whipped cream (no chocolate).
Choux pastry in itself is pretty tasteless, as I already mentioned, but these were quite okay when filled with whipped cream. I am going to make them again pretty soon, letting them cook a bit longer and letting out the steam earlier, so they don't turn sloppy and we can actually eat all of them. But for a first attempt, it went a lot better than I'd ever expected!

Wednesday, 1 October 2014

KitchenAid love

Wow, I actually haven't written anything in the whole of September. How did that go by so fast?
Anyway, now that it's October, and autumn is about to start and my birthday is creeping up (which is less and less of a good thing as years go by) I am hoping there will be more time to actually write stuff here. Because it's not that stuff hasn't been happening. A lot of stuff has been happening, it just that I was simply experiencing the stuff, and not able to write about it. And I will now stop using the word 'stuff'.

One of the things that happened which I can write about because I can be relatively brief is that I bought a KitchenAid. An Artisan KitchenAid, to be exact, in a deep red colour. And if you don't know what a KitchenAid is, go look up pictures now.
I've been wanting to have a KitchenAid for as long as I knew they existed, but first there was the sharing-a-kitchen-with-loads-of-other-(thieving)-people issue, then there was the no-money problem, and then there was the our-kitchen-is-smaller-than-most-people's-walk-in-closet thing. The last hasn't technically been resolved, but when brand-new KitchenAids were being sold for 2/3rds of the normal price, I couldn't resist. So I bought one (with some mental support from my boyfriend) and then waited patiently for 3 weeks for it to arrive.
But oh, how pretty it is! How shiny and strong and robust. Also, how heavy (due to the smallness of the kitchen, I have to move the thing in place whenever I want to use it, and KitchenAids clearly don't expect to be put away in dusty cupboards). But it works like a charm. It came with a big (4.6 l) steel bowl and 3 types of mixers, and I'm already planning to buy loads of accessories once my bank account has recovered. I used it to make brownies for last weekend's family day, and all agreed that they were very tasty brownies indeed.
So apart from the storage issue, I am very happy that my KitchenAid dream finally came true. Now we'll just have to buy another kitchen to fit it in.

Sunday, 31 August 2014

Apple cake

Our apples have been steadily growing bigger and redder, and after another few attempts we have conclusively decided that they are not fit for normal 'eat an apple' consumption, as they are far too sour and tough and somehow just plain yuck. But that doesn't mean we can't put them in other stuff! I've made two apple crumbles already, and yesterday I made an apple cake. This is a recipe my grandmother used to make when my mom was little, but it's not one of those teary-eyed family heirlooms because frankly, it's too simple to put into words.

Ingredients
200 g flour
200 g sugar
200 g butter (softened)
2 eggs
(baking powder)
apples
sultanas/raisins (soaked if you're using dried ones)
cinnamon

Pre-heat your oven to 180 C.
Simply mix together the flour, sugar and butter and add the eggs when the mixture becomes too tough to handle. I added some baking powder because my flour was pretty old, but you can leave that out. Mix thoroughly for about 3-5 minutes and then put into a rectangular baking tin (which you've lined with baking parchment etc).
Cut the apples into little slices and put these on top of the cake mixture, slightly overlapping (in Dutch we call this 'roof tile style'). I used three small apples and my baking tin was filled, but you really just have to try how many will fit. If you have some left over you can always sneak them in between some others.
Dry off your raisins and sprinkle these over. Also sprinkle over some extra sugar and cinnamon.
Bake in the oven for about 30 minutes, until it's dry in the middle.
There is cake mixture underneath, hard to see at this point.


Now the idea is that the cake will spread around and over the apples, partly covering them, and leaving nice 'apple trails' on top. This usually works, but this time, probably because I used baking powder, the cake went a little crazy and gobbled up most of the apples:
Hello cake!

So usually it looks like the bit on the top left, but hey, who cares what it looks like anyway?
It tasted great, moist in the middle and nice and crunchy on the sides. I wanted to add some lemon zest in the mixture but it's a good thing I forgot as these apples are really too sour to be adding some more. But if you're using quite sweet apples, lemon zest may be a nice addition.

There are still lots of apples left on the tree, so I may be trying out some new apple recipes soon, maybe even a tarte tartin if I'm feeling very adventurous!

Friday, 15 August 2014

Red velvet cake (a leaner approach)

I've been fascinated by red velvet cake ever since I had a slice at an American exchange student's party a couple of years ago. Both the strange redness and the extreme sweetness make it an interesting, and also a very American, cake. Only an American would make a cake that screams 'look at me! I',m red!' as loudly as this one, and only an American could suffer the intense sweetness of all that sugar without wincing. However, I had completely forgotten about red velvet cakes until the Great British Bake-off started again, and someone made a red velvet Swiss role.
So I looked up several recipes, most of which on American websites, and I was completely bowled over by the amount of calories you are supposed to put in. There was one recipe that required about a kilo of butter, a kilo of icing sugar, and 8 eggs. These are really not normal amounts for cake making (in my book, at least).
So I went for a more British approach, and picked Lorraine's three tiered recipe, selecting the middle tier (23 cm) as the cake to make. The ingredients were still vastly beyond any limit, so I halved them. For the buttercream I did something completely different, because I refuse to put 600 g of icing sugar in with 300 g of butter, that makes the whole thing just too sweet, especially with fondant icing added on top. So I changed the ratios there a bit. Also, I used a recipe that requires food colouring instead of boiled beets, as I've had enough trouble with beet stains in my life.

Ingredients:
175 g butter
175 g sugar
3 eggs
150 g flour
25 g cocoa powder
baking powder
25 ml food colouring (red, obviously)
500 g rollable fondant icing (white)

buttercream:
100 g butter (softened)
60 g icing sugar
100 g cream cheese

Preheat your oven to 180 C.
Grease the tin and line the bottom with baking paper.
Beat the sugar and butter together until fluffy. Beat in the eggs one by one, then add the flour, cocoa powder, baking powder and a pinch of salt. Add the food colouring (I did this little by little, because the whole thing turns an outraging shade of red which then dies down as you mix the thing). Put in the cake tin and bake for about 40-50 minutes (I forgot to change the baking time to the lesser amount of ingredients, so I ended up with a slightly burned and very dry cake).
When it's done take out of the oven and leave to cool completely.

Red batter

For the buttercream, mix together the butter and icing sugar until fluffy. Add the cream cheese and mix again.

When your cake is completely cool, cut in halve and sandwich the halves together again using the butter cream. Cover the entire outside with the remaining butter cream (this will go better if your cake is not dry, with little red crumbs sticking everywhere). If you have any indentations, use the butter cream to fill them for a more even end result.

Buttercream-covered crumbs

Spread some icing sugar over your work surface and roll out the fondant icing until it is very thin and large enough to cover the whole cake. Transfer onto the cake (this is surprisingly easy) and press down gently so that the icing sticks to the butter cream. You can decorate the cake using anything you want, but I thought this was enough of an exercise for one day.

Slightly burned brown-redness

So, the end result was pretty dry and a bit over cooked, but still quite edible. You can taste the cocoa coming through, and the butter cream was not too sweet. The fondant icing makes for a nice look, but it doesn't really add anything to the taste. All in all, halving the ingredients still made for a pretty decent cake, I can't imagine how rich it would have been with the full amount of ingredients. Still, a very nice cake to have made, and I foresee some red velvet cupcakes in my future, as I still have quite a lot of food colouring left over. And this is one of those 'I'll never be able to do that myself!' cakes that I can now cross of my list.

Wednesday, 21 May 2014

Tiramisu

It's been a while, but it's made such a lasting impression that I still remember it crystal clearly: the day I made tiramisu for 12 people.
We'd rented a holiday home with our sailing group (we usually sleep in the boats but this year wanted to go a bit more, well, grown-up) and after the weekend most of us went home again, but a small group stayed in the home to enjoy the rest of the week. On Wednesday, we had a last-evening-dinner, which featured Pizzarette (baking your own miniature pizzas in a miniature oven with miniature ingredients). The evening before, I offered to make dessert for everyone, probably tiramisu. The response was so excited that I simply had to follow up.

To make tiramisu for 12 people you need:
375 ml whipped cream (unwhipped)
125 g white sugar
6 eggs (you only need the yolks - I froze the egg whites to make meringue at some later date)
750 g mascarpone
8 tbls liqueur (I used Amaretto)
250 ml espresso coffee (cooled)
375 g ladyfingers
cocoa powder

Mix the whipped cream with one tablespoon of the sugar until it is almost firm (this is a difficult decision to make, I stopped just before the 'firm peaks'  stage, but as all the rest of the preparation takes so much time your cream will become less firm again anyway) and set aside. Split the eggs, and in a separate bowl mix the yolks together with the rest of the sugar until it is pale and fluffy (at least 5 minutes). Add the mascarpone bit by bit, mixing well in between so the mixture stays light. Spoon in the whipped cream until you have an even mixture.
Stir the coffee with the liqueur, and dip one side of a ladyfinger into the mixture (it's easiest to use a shallow, rectangular bowl; also, I dipped in the non-sugared side of the biscuits). Then put the ladyfinger in the serving bowl, with the wet side up. Repeat for half the ladyfingers. Pour half of the mascarpone mixture over the ladyfingers. Repeat with the rest of the ladyfingers and mascarpone mixture.
The mixture will be quite wet and liquid at this point, and I thought that it would never set. But after a night in the fridge (prepare at least 4 hours before serving) it was nice and firm! Dust liberally with cocoa powder shortly before serving.
Tiramisus ready to be devoured.

I had to use two bowls, as I didn't have one big enough. Officially it's supposed to be round, but given the shape of the ladyfingers I preferred the rectangular bowl.

I wasn't really expecting much from this, but this tiramisu is seriously good. If you add the mascarpone in very small amounts and whip it long enough it all becomes very smooth and airy. It's about 100000 calories per portion, but it doesn't feel like you're eating something incredibly heavy.
We were with 10 people in total, as it turned out, but both bowls went home empty and scraped clean. And just Sunday we were barbecuing in the park with some people from the sailing group, and they were asking after the tiramisu again. So if you want a dessert to impress, give it a try!

Thursday, 1 May 2014

Shortbread Investigation

So a colleague mentioned that her daughter had made millionaire's shortbread over the weekend, and that reminded me of this thing I've been wondering about (not consciously, but you know) for a while now. How to make the best shortbread? I have 3 cook/baking books all proclaiming that their method is best, and those are only the 3 I'm aware of, so I probably have more.
Shortbread recipe galore!

But to keep things a bit in control I decided to go for these three trusted bakers: Mary Berry, Paul Hollywood, and Lorraine (Baking made Easy). Checking them more closely, it turned out that Paul's recipe and Lorraine's recipe were actually identical in ingredient ratio and mode of preparation, only different in amounts (Paul uses 225 g flour where Lorraine uses 130: I don't know who was there first, but I'm anticipating a fierce shortbread copyright battle in the months to come!). So I could cross one of those off the list, and decided just to make 'The very best shortbread' by Mary Berry and 'Dreamlike shortbread' by Lorraine.
A prickly duel.

Mary's recipe:

225 g flour
100 g semolina
225 g butter
100 g caster sugar
sugar for dusting

 This one is of the 'rub the ingredients together with your fingers' variety, which I really really don't like, but had to try here anyway. You put all the ingredients in a bowl, rub them between your fingers until they become sticky, knead it into a ball and put in the prepared tin (30x23 cm, according to Mary). Prick all over with a fork, then put in the fridge to chill. Preheat your oven to 160, and bake for 35-40 minutes until pale golden brown. Sprinkle the sugar over the top, leave to cool in the tin, then take out and cool further before cutting into fingers.
Mary Berry's shortbread.

Lorraine's recipe:

130 g butter
60 g caster sugar
130 g plain flour
60 g rice flour
pinch of salt

Now I didn't have any rice flour, and to keep things even I used the semolina in Lorraine's recipe as well.
Here, you first mix together the butter and sugar until they are 'pale and fluffy'. Then mix in the rest of the ingredients and mix with your fingers until it becomes a dough. Put into the tin (20x20 cm), prick all over with a fork, chill in the fridge. Preheat the oven to 170 degrees, bake for 30-35 minutes, sprinkle some sugar on top, leave to cool, take out and cut into pieces.
Lorraine's shortbread.

So they are both pretty similar, apart from the first bit: do you 'rub together' or do you use the mixer? Also: can you taste the difference?

Strangely enough, you can. Even though the ingredients are similar, and in similar amounts, they do taste different. Lorraine's version is a bit more condensed, less flaky. But it is a bit more caramely, a bit more sticky sweet. Mary Berry's version is lighter, which is strange because it is almost twice as high, and took far longer to bake properly.
Opinions differed as to which tasted the best: personally I liked Lorraine's version, but some co-workers (I took these to work with me, naturally, you don't want to have 300 g of butter biscuits sitting around the house) preferred Mary Berry's, and one colleague disliked them both immensely.

So which one would I recommend? Mary's version gives you far less dishes and hassle, and gives a lighter texture, so I would probably use that one if you're going to do something else with the shortbread, such as pour chocolate on top, or make millionaire's shortbread. But if it's just shortbread you're after, I'd stick with Lorraine, because it's easier to make and to me, tasted just a little bit better.